Welcome to WinSale onboarding. This guide walks you through running your first sale, from logging in to handing the customer their receipt. The whole process is fast and forgiving — you can ring up a sale with or without a customer record, take more than one payment type on a single ticket, and reprint anything afterward if you want to double-check it.
Open the Point of Sale screen
When you log in to WinSale, you’re greeted by the main WinSale screen. From here, open the menu in the top-left corner and go to:
Modules → Point of Sale
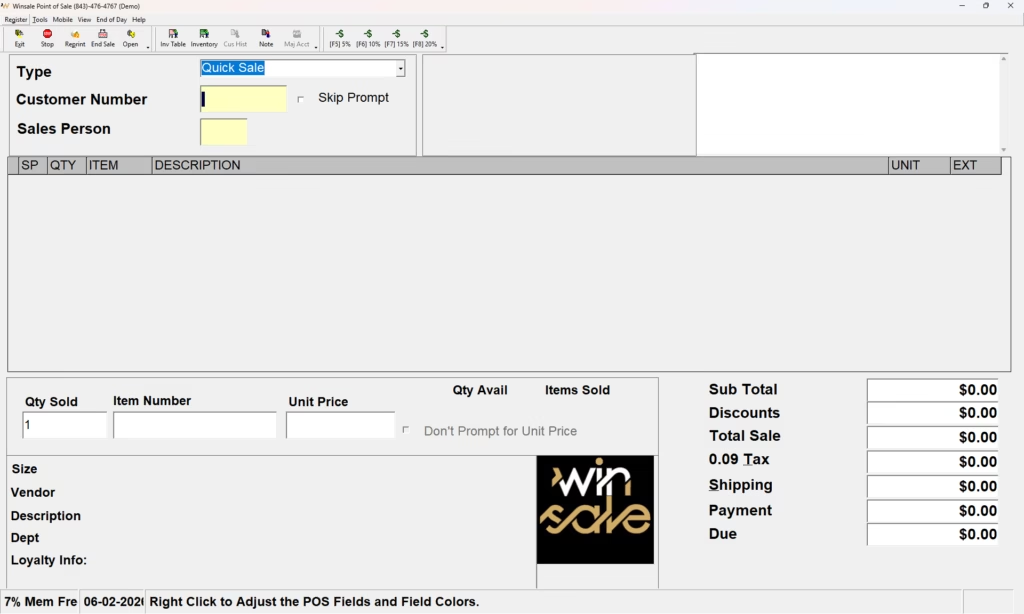
This brings up the Point of Sale screen, where most of the day-to-day action for salespeople happens.
Add a customer (or skip it)
The sales process doesn’t care whether the customer already exists. You can run a sale under a customer name, or — if the customer prefers to stay anonymous — skip the prompt entirely.
If someone gives you their name, start typing it:
- If the customer already exists, their record appears as a match.
- If they don’t exist, WinSale shows you the closest match (for example, typing “D…” might surface an existing customer like Dmitry because it starts with the same letter).
Creating a new customer
If the person you’re looking for isn’t in the system, click the New button. WinSale carries over whatever you’ve already typed, and you can fill in as much or as little information as you like. When you’re done, click Save.
WinSale then asks for a new customer reason — how the customer heard about you. This is information your salespeople fill in (for example, “word of mouth”).
Don’t want to be asked this every time a new customer walks in? You can turn the new customer reason prompt off in Settings.
Once saved, the customer exists in your database and you’re ready to proceed.
Select the salesperson
By default, you’ll usually have a house account available as a salesperson for generic sales. To use it, type 1 and the house account is selected.
Add items to the sale
Normally you’ll scan the barcode of the item you’re selling. If you don’t have a scanner handy, you can type the item in instead — WinSale accepts either the UPC or the item number.
- Enter the item number (or UPC) and press Enter.
- WinSale pre-fills the price from inventory.
- Press Enter again to add the item to the ticket.
The running totals appear automatically. In this example, the subtotal is $200, tax is $18, and the amount due is $218.
Check out and choose payment
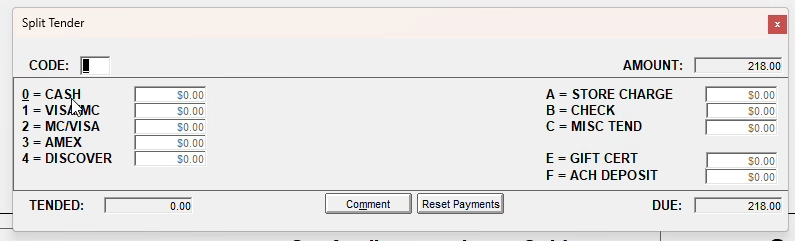
When the customer is ready to pay, either click End Sale at the top of the screen or press F9 on the keyboard. WinSale displays your checkout options, with a code for each payment type. For example:
- 0 — Cash
- 1 — Visa / Mastercard
- …and so on for the other payment types.
Taking a split tender
WinSale lets you split a single ticket across multiple payment types. To take part in cash and the rest on a card:
- Select the cash code and enter the cash amount (for example, $20).
- WinSale automatically calculates the remaining balance to split onto another payment type.
- Select the next payment type — for example, a credit card.
- Keep breaking down the balance as needed. WinSale keeps prompting until the amount due reaches zero.
You can apply as many payment types as the customer needs. In this example the ticket ends up with three: cash and two cards (a Visa/Mastercard and a Discover).
Process the card payments
When you press Enter, WinSale opens the credit card prompt and asks you to swipe the first card, showing the exact amount for that swipe.
In a live setup this happens automatically — the customer swipes their actual card and the amount is captured for you. The steps below describe test mode, where the card number is typed in manually.
- Swipe (or, in test mode, enter the card number) and click Process.
- Capture or skip the signature as appropriate.
- WinSale approves the first portion of the balance (for example, $98) and then prompts for the next card split.
- Repeat Process for the remaining card until the balance is fully paid.
Print the receipt
Once payment is complete, WinSale prompts you to print the ticket. In your setup this happens automatically because your printers are configured as the default. (On a machine with no default printer, you’d simply cancel out of the print dialog.)
The sale is now complete. You get two copies of the receipt — one for your records and one for the customer.
Verify or reprint a sale
If you want to confirm a completed sale, click the Reprint button. You’ll see the ticket number and the customer’s name, and from this screen you can:
- View the ticket to see what was purchased and how it was paid for.
- Reprint the receipt directly.
- Pull it back up to redo it if needed.
That’s it
You’ve completed a full sale in WinSale — adding a customer, ringing up an item, taking a split-tender payment across cash and cards, and printing the receipt.
If you have any questions, leave a comment under the video or reach out to our support team for help.
- Support email: support@winsale.net
- Phone: 843-476-4767


