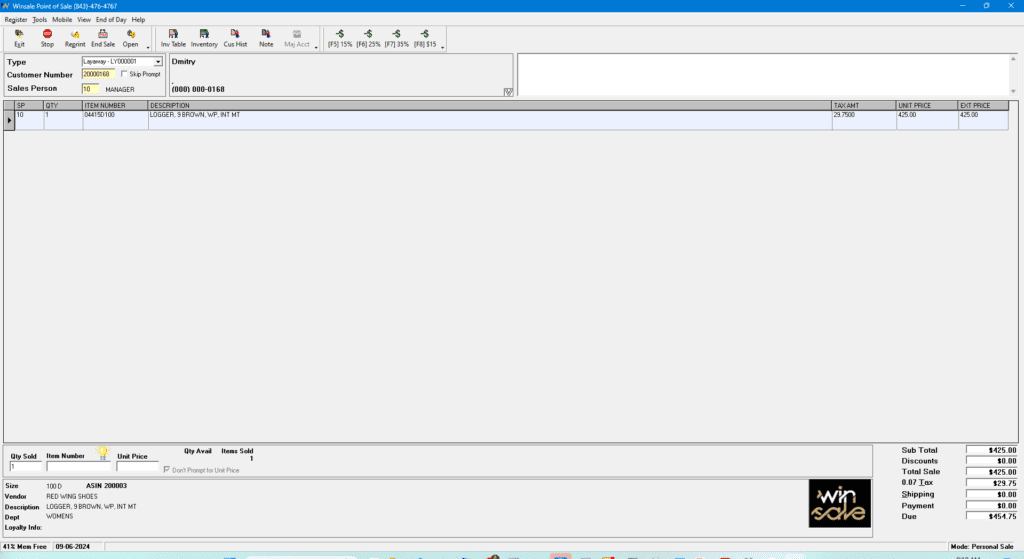
In this step-by-step guide, we will be discussing the creation of a layaway sale.
Please note, layaway is NOT a final sale. Creating a layaway only “reserves” the items in inventory by decreasing On Hand Qty in Inventory file. Sale is not final until the layaway is settled and you got the full payment for it and converted it into a sale.
On the Point of Sale Screen, click on Register.
Select Layaway.

Next screen is asking you to either search for open layaway or create a new one. In this case, since we are creating a new one, we are going to hit OK.

As you notice, the screen goes back to Point of Sale, this time with Type of Sale showing Layaway + layaway number that always will start with LY.
In order to continue, please input the customer name and your sales person number on the screen as usual.
Then proceed with inputting items to the layaway.

Upon completion of the layaway input, press F9 or End Sale button. You will be presented with Split Tender screen.
Select option D – LEFT OPEN if you do not take any deposit for layaways.
– or –
Select a payment type for a deposit (0 for cash for example), and then D – LEFT OPEN in order to keep the deposit and still have the layaway

Select your printer to print a layaway receipt and you are done!


